If you’re starting up your own business, you’ll probably want to have an email address exclusively for your business. This makes it easier to separate your personal email from that of your company, and also allows you to create an email signature specific to your business.
With more business communication being done via email than in person or by phone, it’s essential to have an email address that reflects your business.
This step-by-step guide will show you how to create business email so that you can get started with your business on the right foot.
- How To Create Business Email
- Can I get a business email without a website?
How To Create Business Email
We will walk you through the legit and freeway of creating a business email. And then how to use your created email with a Gmail.
Instead of using a normal email address (e.g – abc@gmail.com), you will be able to create a professional business email (e.g – Contact@yoursite.com) after reading this article.
Now, we will walk you through the steps of creating your business email.
Step 1 – Buy a Domain name
You will be able to create an email for your business for free only if you have a domain name. So make sure to purchase your domain name first.
To purchase a domain name, please go to bluehost.com, namecheap.com, hostgator.com, or hostinger.com.
The hosting platforms such as Bluehost are the best in the market, here you can buy your memorable Domain name.
Step 2 – Create an account in Improvmx
Improvmx is a free email forwarding website. With the Improvmx email forwarding tool, you can send and receive emails with your domain name using your Gmail.
In other words, Improvmx will let you forward all your emails coming to your business email to your Gmail inbox.
To create an account on Improvmx. Click here
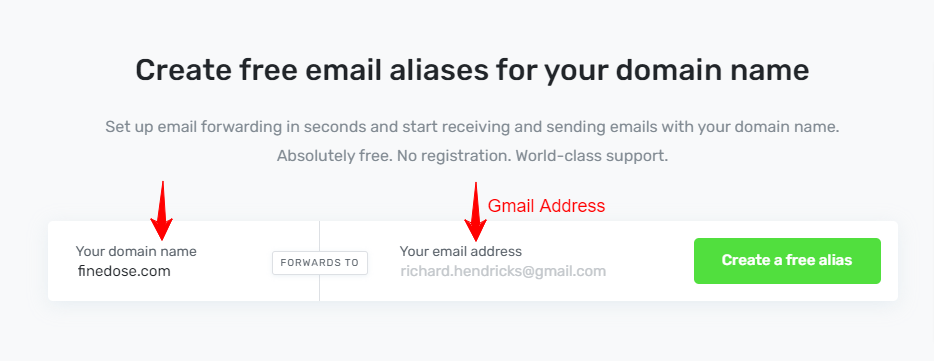
Go to its dashboard and enter your domain name and email (Gmail) address. Click “create a free alias” to create your improvmx account.
Step 3 – Add Improvmx MX records to your hosting DNS page
After creating improvmx account, look for its MX records.
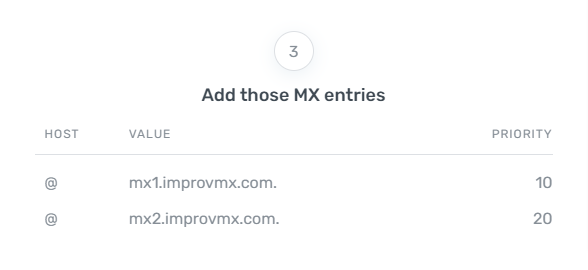
Now, you need to add these MX records to your Domain provider’s DNS records.
So log in to your domain name/hosting provider (in our case it’s Hostinger).
Find your domain’s DNS records (go to your Domain’s DNS records).
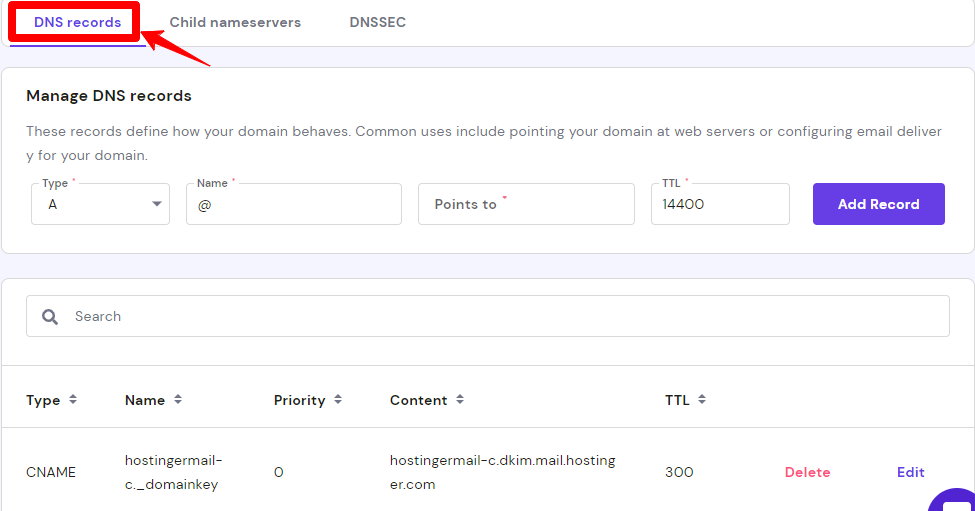
To Add improvmx MX records to your DNS record just enter the details and click on “add record”. Add both MX records one by one to your DNS records.

Check if the MX records are added properly or not.

Step 4 – Activate Improvmx Email Forwarding
The main purpose of adding the MX records to DNS records is to activate the email forwarding service of improvmx
To check if email forwarding is active or not. Just go back to your Improvmx account and click on “CHECK” until “Email Forwarding needs setup” changes to “Email forwarding Active”.

Step 5 – Create An Email Forward
Once the email forwarding is active on Improvmx, now is the time to create an email forward.
Choose the name of your business email. It can be anything like contact@yoursite.com or support@yoursite.com. In our case, it will be support@finedose.com.

Finally, add your personal email address and click on ‘ADD’. And test if the email forwarding is working on not.
Creating an email forward means that any email that you will receive on your business email will be forwarded to your personal email or Gmail address.
Till now, you are able to create free business emails and you can receive emails to your business email directly into your Gmail inbox.
But How to send emails from your Gmail inbox directly using your business email?? Let’s see.
Step 6 – Send Emails from the Business Email address
Sending email directly from Gmail is tricky. We want to send emails to our customers/clients using business email, not our personal email. How we can do this?
It is possible with the GMAIL SMTP service that will let you send 3000 emails per month.
This means you can send 3000 business emails using Gmail for totally free.
Let’s see How to send emails from your Gmail inbox directly using your business email.
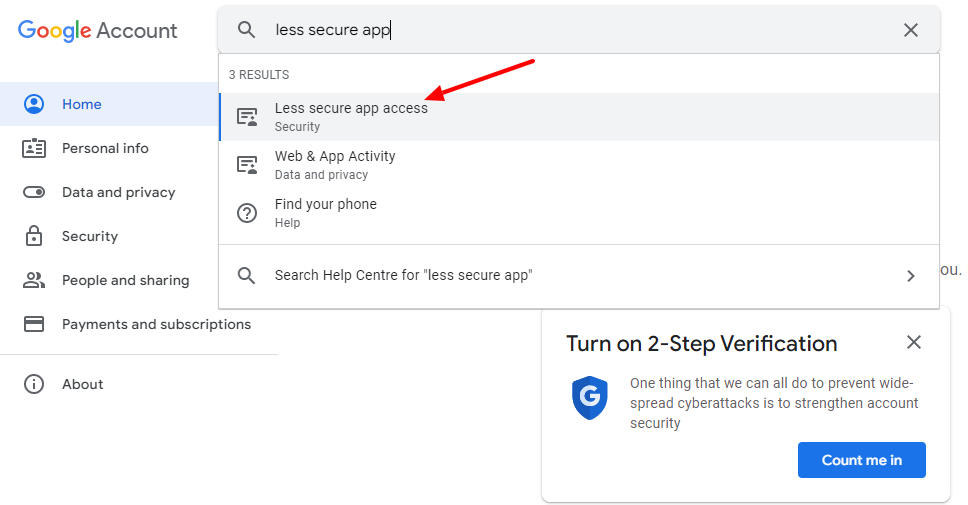
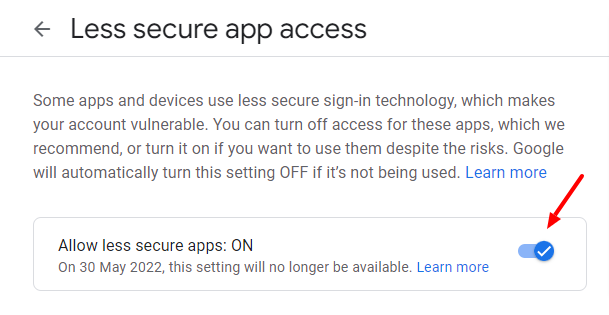
1. Go to your Google account and search for “less secure app”
Just go to “manage your google account” and search for the “less secure app” in the search bar.
Click on the “less secure app” and On the next page just enable the option.
2. Add Your Business email to Gmail
Once enabling the less secure app option or changing the google settings, now move on to the last step of how to create business email.
In the last step, add your business email to Gmail. By doing this you will be able to send emails to your customers directly from Gmail. And they will receive your business email address instead of your personal email address.
Go to your Gmail account settings and click on ” all settings” and go to “accounts and imports”.
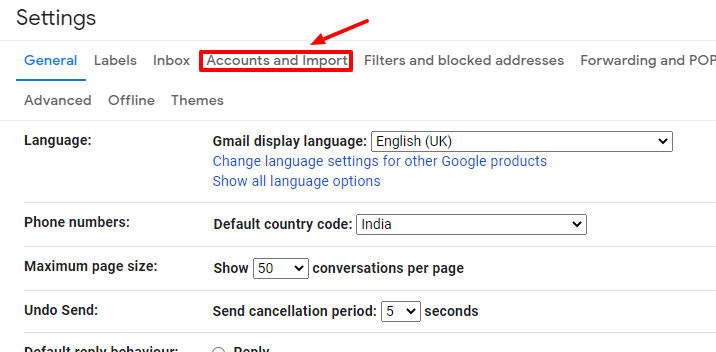
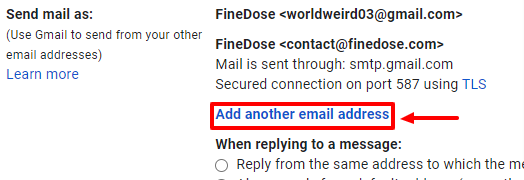
In “Accounts and import”, scroll down a bit to find the “send mail as” section.
In the “send mail as” section, click on add another email address.
The window will pop up. Fill your Business name in the “Name” field and Created Business Email in the “Email address” field.
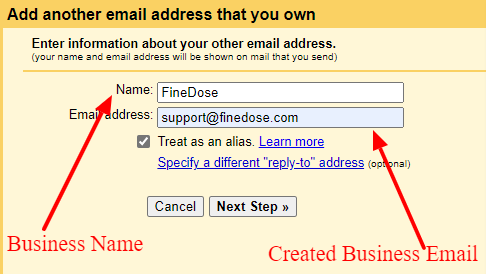
Once the fields are filled, click on the next step, and on the next page, you will find three fields: SMTP server, Username, and password.
Fill “SMTP.gmail.com” In the SMTP server field, your personal Gmail address in the Username field, and your Gmail Id password in the password field.
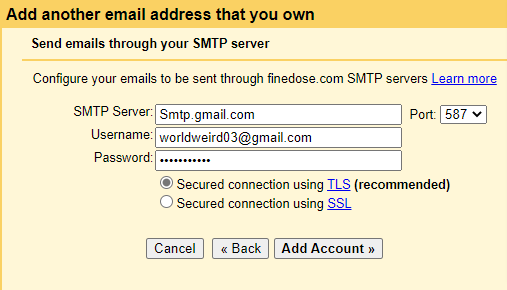
Click on add account and Gmail will send a verification code to your personal Gmail address. Copy the code and paste it to verify.
Once verified, your business email (support@finedose.com) will be added to your Gmail.
Make your “Business email address” a default. So that every time you send an email from Gmail, your customers will read your Business address instead of your personal Gmail address.
Create as many business emails for free using the Improvmx tool or a website.
Can I get a business email without a website?
Yes, you can create a business email without a website. Gmail for Business is an excellent choice for creating a professional email address and it doesn’t require any coding or technical knowledge to set up.
