The process of transferring websites is a lengthy process but is not as difficult as people think. We will migrate the full website from one hosting to another hosting and the process is almost the same no matter which hosting you are using.
What is Website Migration?
Website migration is moving a website from one server to another. Full Website migration is a 3 steps process.
After domain transfer, the whole website data transfer (one host/Server to another) and then domain pointing completes the website migration process.
How To Migrate A Website From One Server To Another
Once the domain is transferred to a new host. The next step is to switch the website data to a new host. Remember not to migrate the website files before domain transfer. as it is a wrong process.
Step 1: Download all the files or data of the Website
First of all, we need to download all the files on our website. Go to the Cpanel and then click on file manager. Once we are in file manager we need to download all the files that are in public_html folder .

Right click on the public_html folder and click on the compress in order to download the public_html files in zip format.
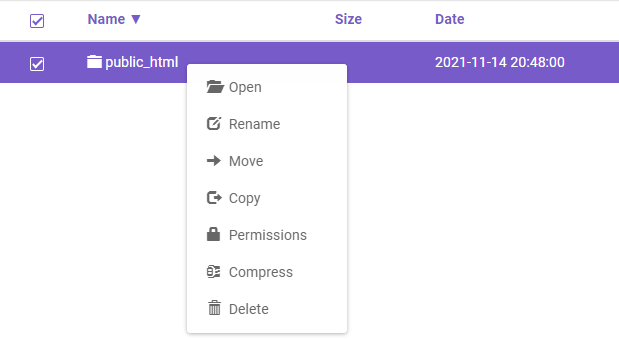
After the public_html zip file is downloaded on a computer. Extract the files and check the extracted folder to find all the files of your website.

Step 2: Export the Database of Website
After downloading the files of the website to the computer, now is the time to export the database of the website which you want to migrate.
Go to Cpanel again and click on Phpmyadmin . In Phpmyadmin click on the database which you want to export.

Then click on export first after opening the database and then click on GO.
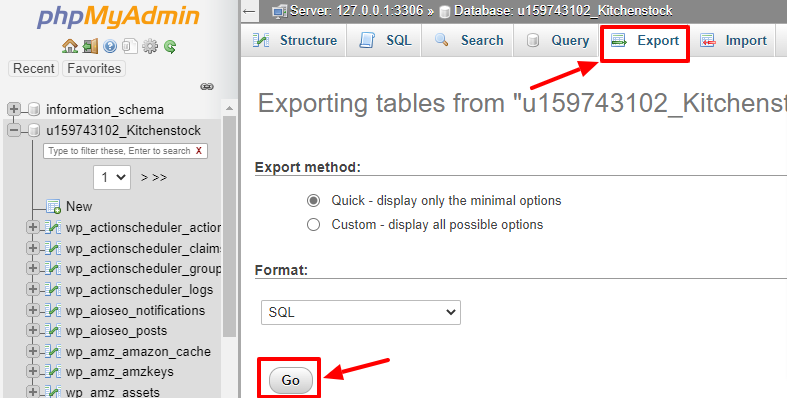
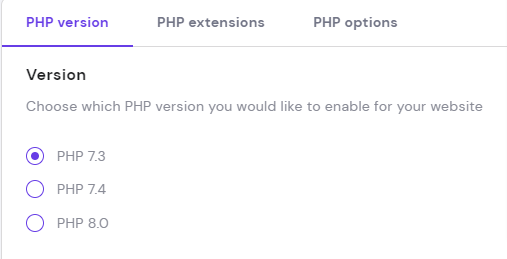
Clicking on “Go” will export the database successfully. Then close the Phpmyadmin and go to Cpanel again to check the “PHP Version”.
If you have another PHP version selected on your new host then please select the PHP version which you have checked on your old host.
Step 3: Access FTP account of New Webhosting Using FileZilla
To switch website hosting download the Filezilla first in order to process further. Please download by going to this website (FileZilla – The free FTP solution (filezilla-project.org).
Now open the FTP accounts details of your new web host and also open the Filezilla.
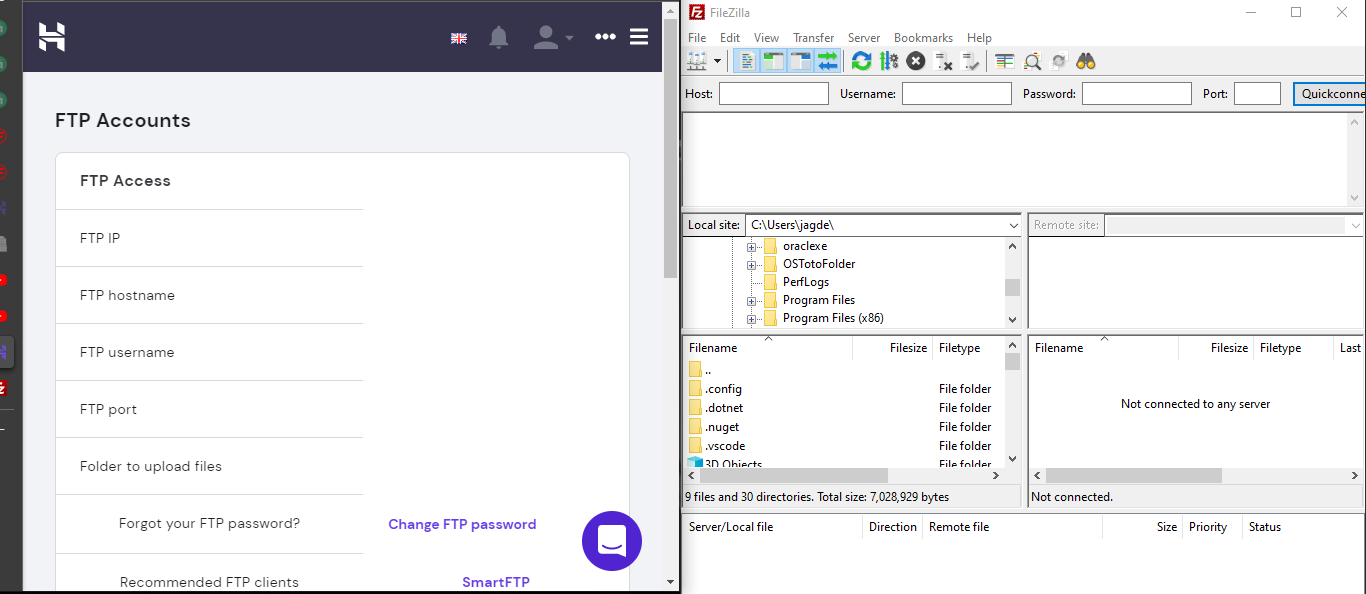
Set up an FTP account of new web hosting by using an FTP client (Filezilla). The FTP details are required once you install the Filezilla. Now open the FileZilla and enter the required FTP credentials. Basically, we are doing this to get access to all the files of our website.
- Click on the top left corner in the Filezilla FTP client.

- Now click on the new site and enter the name of your site.
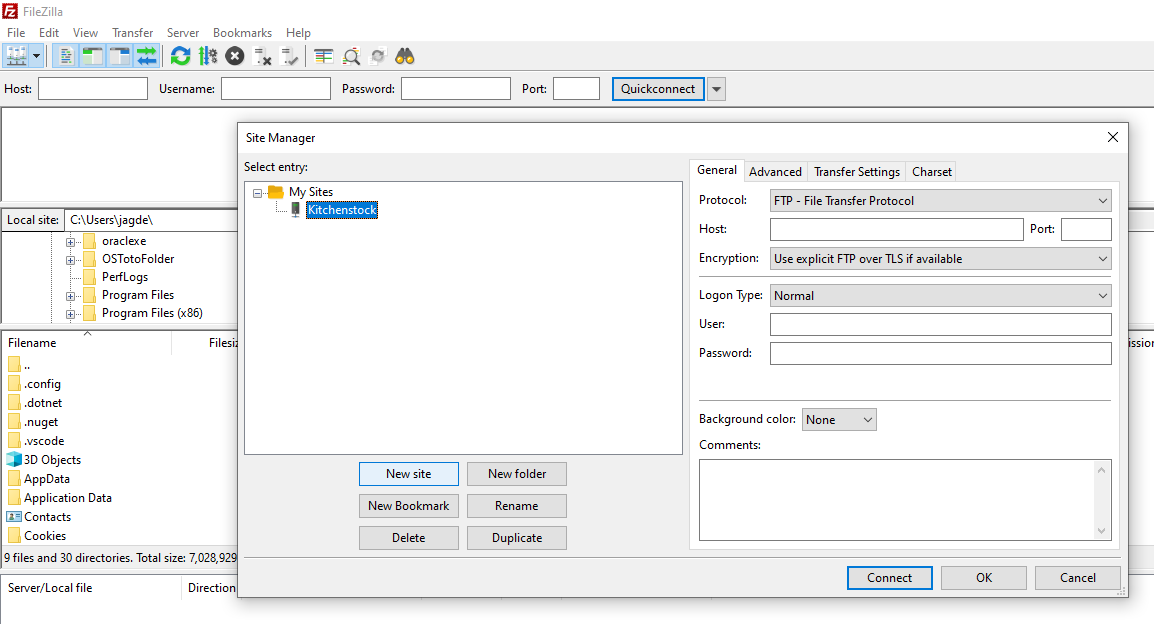
- Now fill in the FTP details (FTP password, FTP host, FTP User) and click on connect.
Remember, the FTP details of your new website you have to enter. Go into FTP accounts for finding FTP credentials.
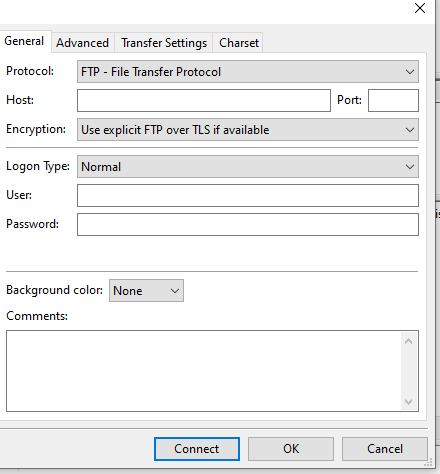
This is how you connect the FTP account to access all the data of a website.
Step 4: Uploading files from Old Host to New Host
We have downloaded the Public_html folder and database from the previous web host. Now it is time to upload the files to a new web host or server.
- Go to Filezilla and search for the public_html folder we have downloaded on the computer. Once located, open the public_html folder and select all the files.
- Once selected, right click on them and click on upload.
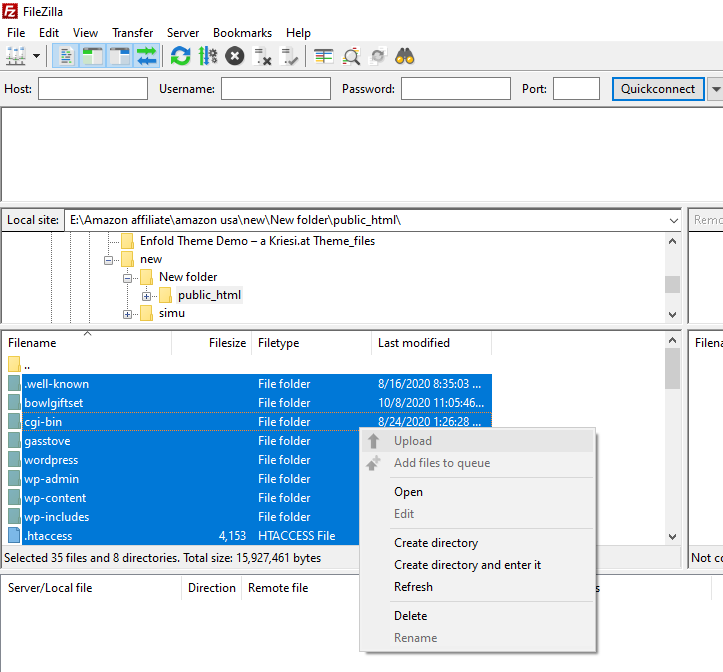
The process of uploading the old web hosting files to the new web hosting server can take time. Once the files uploading is completed do step number 5.
Step 5: Import Database
Now the fifth step of website migration is importing the database we have downloaded from the previous web host.
Before importing we need to create a new database on a new web host and then we have to import the old database.
- Go to MySQL Databases and create the new database by filling in the database name, Username, and password .
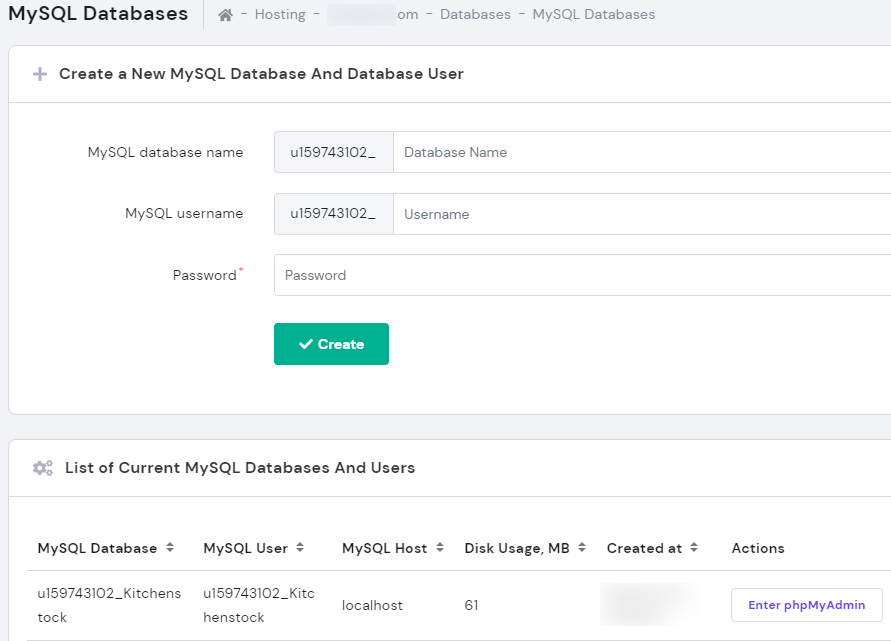
- Once created, Go to PHPmyadmin and select the database we have created and click on import. Choose an old database file to import from the laptop and click on go. This will import the old database from our previous web hosting to the new web hosting.
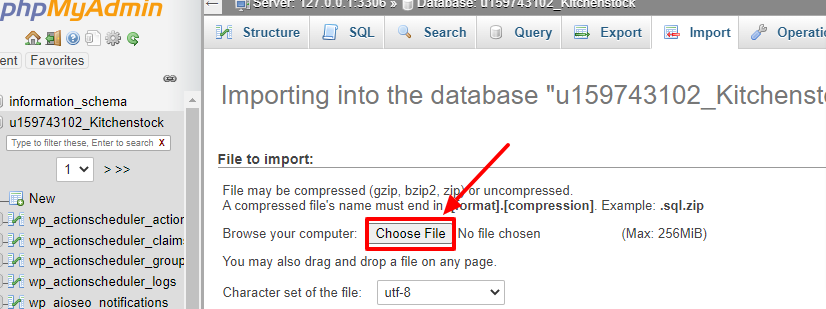
Note, We have just imported our old database into the new database we have just created.
Step 5: Locate WP config File
Our last step is to find the WP config file from the public_html folder we have just uploaded to a new host or server.
Go to file manager again and click on the uploaded public_html folder. Search for the file called WP config file. Righ click on the wp.config.php and click on edit. The file will open where we need to replace the old database details (database name, username, and password) with the new database details we have just created.

The files or data of our website have been created successfully without any loss of data. This method of the website migration process is pro and anyone can transfer their websites with ease.
Once the data is transferred, the next step is to point to the domain name. The pointing domain will complete the process of Website transfer.
